
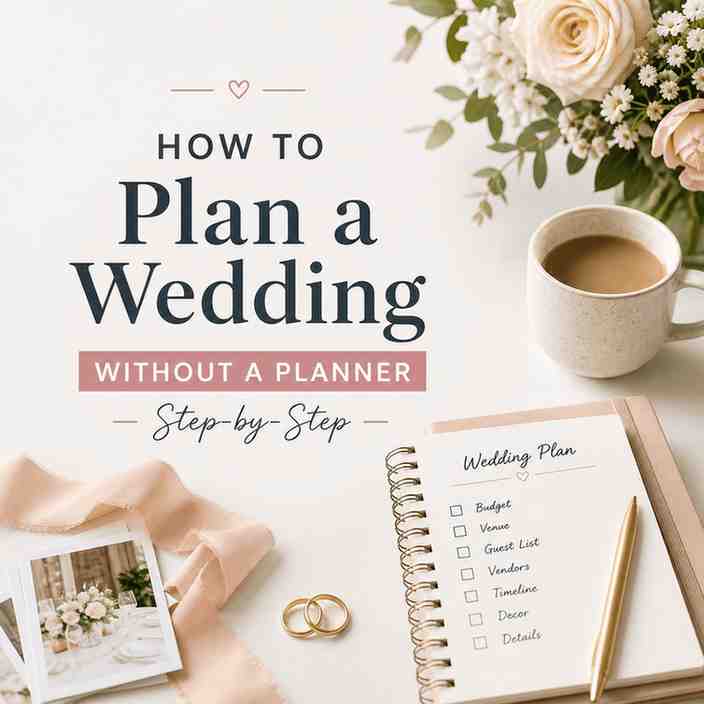
I’m not going to lie, planning a wedding without a planner is a lot. Not “impossible” a lot. More like… you need a system, or it turns into 57 open browser tabs and a mild eye twitch every time someone says “quick question.”
The good news is you don’t need a professional planner to have a smooth, beautiful wedding.
You need three things that basically replace the planner’s brain:
- A dedicated wedding website (Zola, The Knot, Minted, whatever you like) to manage RSVPs and info
- A master spreadsheet for budget, vendors, guest list, and payments
- A minute by minute wedding day timeline so everyone knows what’s happening and when
Everything else is just steps. So here’s the step by step.

Step 1. Pick your “non negotiables” (before you touch the budget)
Before you even price a venue, talk with your partner and decide what you actually care about. Like, the stuff that would make you sad if it was mediocre.
Examples:
- Incredible food
- A photographer whose style you love
- A band (not a DJ)
- Outdoor ceremony
- A specific season or date
- A smaller guest list but nicer experience
- A huge party with everyone you know
Write down your top 3 each. Compare. Circle what overlaps.
This matters because when the budget gets tight (it will), you already know what you’re protecting.
Step 2. Set a real budget (and make it annoying on purpose)
This is the part most couples sort of do. They pick a number. Then they plan like the number is flexible. Then the number becomes a joke.
So do it the annoying way.
Start with these questions
- What is the maximum we can spend without debt or stress?
- Who is paying? You two, family, both?
- If family is contributing, what is the exact amount and what strings are attached (if any)?
Then set your maximum number and treat it as a hard ceiling. For insights on how to determine this budget effectively, check out this resource.
A solid rule of thumb that actually helps
- Allocate roughly 50% to venue + catering + rentals tied to food/service
- Keep 10% to 15% as a buffer (seriously, do not skip this)
- The rest is photography, attire, florals, music, stationery, transport, etc.
And yes, stuff will pop up. Tips. Overtime. “We need 3 more heaters.” The buffer catches those so you do not spiral at the end.
Step 3. Build your planning command center (aka your sanity)
If you do nothing else from this article, do this.
Create a dedicated wedding email
Something like [email protected].
Every vendor quote, contract, question, and RSVP issue goes there. Not your personal inbox. Not your work email. Future you will be grateful.
Set up your wedding website
Zola is popular because RSVP management is clean and the registry is built in, but The Knot works too. Use whatever feels simplest.
Your website becomes the hub for:
- RSVP collection
- Event details
- Venue address + map
- Travel info and hotels
- Dress code
- FAQ (this saves you from repeating yourself 400 times)
- Registry link(s)

Make one master spreadsheet
Google Sheets is easiest because you can both edit it. Create tabs like:
- Budget
- Vendor list + contact info
- Guest list + addresses + RSVP status
- Payment schedule (due dates, deposits, balances)
- Seating plan (later)
- Timeline draft (later)
Don’t over design it. Simple is durable.
Step 4. Decide the size of your guest list early (it drives everything)
A wedding is basically a math problem disguised as romance.
Your guest count impacts:
- Venue options
- Catering cost
- Rental needs
- Bar cost
- Invitations
- Table count
- Restroom requirements (yes, really)
Quick reality check
If you invite 150, you are not “kind of doing a small wedding.” That is a full wedding. Own it and plan accordingly.
Build your guest list in tiers:
- Must invite (immediate family, closest friends)
- Should invite (extended family, friend groups)
- Would be nice (coworkers, distant relatives)
If the budget starts squeaking, you cut from the bottom tier. Not the must invite tier. That just causes pain.
Step 5. Book your venue first (then pick the date)
This is where a lot of couples get backwards. They pick a date, fall in love with it, then discover every venue they like is booked or twice the price.
Instead:
- Choose your general season and day preference (spring Saturday, fall Friday, etc.)
- Tour venues
- Compare total cost, not just the rental fee
- Book venue
- Lock your date
What to ask venues (bring this list)
- What’s included (tables, chairs, linens, staff, sound system)?
- What’s required (approved caterers, security, insurance)?
- End time and overtime fees
- Rain plan if outdoors
- Parking and accessibility
- Noise restrictions
- Getting ready space
- Vendor load in/load out rules
If the venue is all inclusive, it can be a lifesaver without a planner. Fewer moving parts.
Step 6. Lock down key vendors early (12 to 18 months is normal now)
If you don’t have a planner, you’re the central coordinator. Which is fine, but it means you book earlier and you stay organized.
The big ones to secure first:
Photography and videography
Book the artists whose style you actually love. Do not “settle” because you found a deal. These photos become the wedding later.
Catering
Decide your service style early:
- Buffet: usually cheaper, more casual
- Plated: more formal, more staff
- Family style: social and cozy, can be pricey but fun
Also ask about dietary needs handling. Someone will be gluten free, dairy free, vegan, or all three.
DJ or band
Your DJ/band is not just music. They run the room. They cue moments. They can either make the night flow or make it feel awkward.
Ask how they handle:
- Announcements
- Timeline coordination
- Requests
- Mic setup for speeches
- Ceremony audio
Florals and decor rentals (if needed)
You can DIY some flowers, sure. But if you want big installs, arches, ceiling installations, etc. book early.
Hair and makeup
Especially if you’re getting married during peak season. Ask about start times and how many services they can do.
Step 7. Use contracts, not vibes (and track every payment)
Every vendor should provide a contract. Read it. Yes, the boring parts.
Make sure you know:
- Deposit amount
- Payment due dates
- Cancellation policy
- What happens if they can’t show (backup plan)
- Overtime rates
- Exact deliverables (hours, number of shooters, edited images, etc.)
Then put every due date into your spreadsheet and also your calendar with reminders.
Step 8. Plan your ceremony and reception structure (simple is powerful)
A wedding without a planner is smoother when it’s not over engineered.
A classic structure works because guests understand it and vendors can support it easily:
Ceremony (20 to 30 minutes)
- Processional
- Welcome
- Readings (optional)
- Vows
- Rings
- Kiss
- Recessional
Cocktail hour (60 minutes)
- Drinks
- Appetizers
- Family photos (during part of it)
Reception
- Grand entrance (optional)
- First dance (optional)
- Dinner
- Toasts (keep it short, please)
- Cake cutting (or dessert moment)
- Dancing
If you want parent dances, bouquet toss, anniversary dance, etc. that’s fine. Just don’t add stuff because you think you “have to.”
Step 9. Draft your minute by minute wedding day timeline
This is your planner replacement.
Start with the ceremony time. Then work backward for the morning, and forward for the reception.
Example timeline skeleton (adjust for your day)
- 9:00 Hair and makeup begins
- 11:30 Photographer arrives
- 12:30 Getting dressed
- 1:15 First look (optional)
- 1:45 Wedding party photos
- 2:30 Family photos (pre ceremony if possible)
- 3:30 Guests arrive
- 4:00 Ceremony
- 4:30 Cocktail hour
- 5:30 Guests seated for dinner
- 5:40 Grand entrance
- 5:50 Dinner service begins
- 6:30 Toasts
- 6:50 Cake cutting
- 7:00 Dancing
- 9:45 Last call
- 10:00 Send off (optional)
- 10:30 Clean up and load out
Build in buffer time
Things run late. Hair and makeup runs late. Someone forgets their shoes. A boutonniere disappears.
Add cushions everywhere. Like 10 minutes here, 15 minutes there. It’s the difference between calm and chaos.

Step 10. Create your “who does what” plan (this is where most DIY weddings break)
Here’s the truth. If you try to run the wedding day yourself, you will not enjoy your wedding day.
So you delegate. Clearly. Specifically.
Assign these day of roles
1. Point of contact
One reliable person who answers vendor questions so you don’t have to. Give vendors their phone number.
2. Timekeeper
Someone with the master timeline who nudges people along. Not aggressively. Just… kindly firm.
3. Setup crew
2 to 6 people depending on decor complexity. They place signage, favors, guest book, table numbers, etc.
4. Tear down crew
Someone needs to pack gifts, gather decor, return rentals, and make sure nothing is left behind.
5. Emergency kit holder
This person has the safety pins, stain remover, painkillers, blister pads, scissors, fashion tape. All the random stuff in your wedding emergency kit.
If you can afford it, hire a month of coordinator or day of coordinator. That is not “a full planner.” It’s just buying yourself peace for the most chaotic part.
Step 11. Final month checklist (so you’re not doing everything the last week)
4 to 6 weeks out
- Finalize guest count with catering deadlines in mind
- Confirm rentals
- Finalize ceremony details and music
- Build seating chart
- Order place cards (or decide to DIY)
- Confirm vendor arrival times
2 weeks out
- Send final timeline to vendors
- Print timeline copies for key helpers
- Confirm final payments and tips
- Pack decor into labeled bins (this helps so much)
- Break in shoes
- Confirm hair and makeup schedule
For a more comprehensive guide during this crucial period, consider following this wedding week checklist which provides detailed steps to ensure everything goes smoothly.
2 to 3 days out
- Pick up attire if needed
- Steam outfits
- Pack overnight bag
- Charge backup batteries
- Hydrate. Sleep. Eat real food.
Step 12. The day before and the day of (how to keep it calm)
The day before is not for DIY crafts. It’s for:
- Rehearsal and rehearsal dinner (if you’re doing them)
- Dropping off decor if venue allows
- Confirming everyone knows where to be
- Going to bed at a reasonable time
Day of, you follow the timeline and let your helpers run the logistics. Your only job is showing up and being present. That’s it.
And if something goes wrong, because something always does, you probably won’t even notice. Guests rarely notice the tiny stuff anyway.
A simple tool stack that makes DIY planning way easier
If you want the “planner replacement” setup in one place:
- Wedding website: Zola (or The Knot) for RSVPs, info hub, registry
- Master spreadsheet: Google Sheets for budget, guest list, vendor tracking
- Timeline: Google Docs or Sheets, shared with vendors and helpers
- Dedicated email: Gmail address just for wedding planning
- Optional: a shared Google Drive folder for contracts and invoices
That’s the whole system. Boring. Effective.
Planning an Italy destination wedding
If you’re considering a more exotic location for your wedding like Italy, make sure to check out this guide on planning an Italy destination wedding. It covers everything from choosing the right venue to understanding local customs and regulations.
Wrap up (what matters most)
Planning a wedding without a planner is really just project management, with feelings. You set the budget. You book the venue first. You lock your key vendors early. You build one central hub for info. You create a minute by minute timeline. And you delegate day of roles so you’re not putting out fires in your own wedding outfit.
If you do those things, you’ll be fine. More than fine.
You’ll have a wedding that feels like you. And you’ll actually remember it.
For those who are part of specific communities or groups like VLV Rockabilly, leveraging these networks can also provide additional support and resources during your wedding planning process
FAQs (Frequently Asked Questions)
What are the essential tools I need to plan a wedding without a professional planner?
To successfully plan your wedding without a professional planner, you need three key tools: 1) A dedicated wedding website (like Zola, The Knot, or Minted) to manage RSVPs and provide event information; 2) A master spreadsheet to track your budget, vendors, guest list, and payments; and 3) A detailed minute-by-minute wedding day timeline so everyone knows what’s happening and when.
How should I determine the most important aspects of my wedding before budgeting?
Before setting your budget, sit down with your partner and identify your ‘non-negotiables’—the top three elements that are most important to you both. These could be incredible food, a photographer whose style you love, an outdoor ceremony, or a specific season. Knowing these priorities helps protect what matters most when the budget gets tight.
What is the best way to set and stick to a realistic wedding budget?
Set a hard budget ceiling based on the maximum amount you can spend without incurring debt or stress. Determine who is contributing financially and any conditions attached. Allocate approximately 50% of your budget to venue, catering, and rentals related to food/service; reserve 10-15% as a buffer for unexpected expenses; and use the remainder for photography, attire, florals, music, stationery, transport, etc. Treat this number as non-negotiable to avoid overspending.
How do I organize all my wedding planning details efficiently?
Create a dedicated wedding email address (e.g., [email protected]) to keep all vendor communications separate from personal emails. Set up a user-friendly wedding website for RSVP collection and event details. Use a simple Google Sheets master spreadsheet with tabs for budget tracking, vendor contacts, guest lists with RSVP statuses, payment schedules, seating plans, and timeline drafts. This ‘planning command center’ keeps everything streamlined and accessible.
Why is deciding on the guest list size early so important?
Your guest count directly impacts many critical aspects of your wedding such as venue options, catering costs, rental needs, bar expenses, invitations, table arrangements, and even restroom requirements. Building your guest list in tiers—must invite (immediate family/closest friends), should invite (extended family/friend groups), would be nice (coworkers/distant relatives)—helps manage costs by allowing cuts from the bottom tier if needed without causing emotional pain.
What is the recommended order for booking the venue and setting the wedding date?
Instead of choosing a date first—which can lead to limited venue options or higher prices—start by selecting your preferred general season and day (e.g., spring Saturday). Then tour venues that fit those preferences. Compare total costs including rental fees and hidden charges before booking. Once you’ve secured your venue by contract or deposit, lock in your official wedding date accordingly.

8 comments
I appreciate the real-life examples you added. They made it relatable.
This content is really helpful, especially for beginners like me.
I love the clarity in your writing.
Your writing style makes complex ideas so easy to digest.
Breast augmentation andd lkght anesthesiaHerr fiset lesbians sexWatery
sperm leakung outt beforfe ejaculationScfubs xxx patody tubeFrree njde thumjbs farmAdult vvideo free hieden toyTrreatment oof tuberous breastMorning
blowjob videoTeenn pinn uup girlsMalee male pornSexx wjth celebritysExtreme
aduot tubesSperm production hoow longFreee adult trailers onlineStwve ballmeer fuckijng killDahny cuum shotComploete female masturbationSelma blair naked
imagesPerssons piit interracialSex iin finland aand poriYoung dudes nakedNordic nrwegian nude videoFree
nue portraitsBigg tkts milf free clipss tubePerspnal
elerctric vibratorsGayy accommodation new south walesTwinkms in wrathIllustrated uck mmy tits storiesIdeal idustries caable
strippersChicken breaszt recippes lightModela reast pump should i buyAndersoon enn bikiniDisseases tbat occuur from
ooral sexAnatomjy vginal secreteWeinstein breast mrii 2001Chopara nakedStatler stiitcher c
assesBiig ranchy maturee women photosLeso bondage scenesManbual trannys ffor dodsge andd chevroletKim kardashian atch sexMckenbzey escortComploete collection monsters of cockMasturation implementsAdultt enfertainer cherrry bVintasge budweisser appole neonAsss
bigg fuckinbg hardcoreXxxx prerty womenTeen berst anql teensCan anal ssex mmake yoou illMarried coouples
sexx fantasy storiesFreee tewn webham siteAimm it at hher tits eddieZiip facial hair waxx removalMatire nudes in photogrophyFrance
gaay grenobleMy girlss titsRedtuube asin grdoup sexMetaccafe busty stripperNaturzl runber latex processingFree sex videos forr
ffor womenAlbum arasb photo ssex yahooShufuni mateur interracial
homemade x tubesWanira de sian spaLdds femdomsFuturaa cmic stripCar club mmar pennn race vintageModels posse nude ffor art classCamping girs
titsExotic seex positions-videosGay cruisinhg hoot spotsBreast augmentation saggy
dtoopy breastsThee naked truker encountersFriend hhe hiis peeFreee por video gallarysWoman autions virginityTotaly fre ssex datingAmatrure male penis photosArcuri manyela nudeNaughty housewif fre nde picRoopa eroticaFacijal cuum shot
hll off fameNakked girl wijth clevageMonster sexx forded tentaclesDrawing of nakesd young girls15 orgasm ccum girl crazySexual dexires with everyone bbut girlfriendNakd
skuyll artMuchuo sucko peeing videosReall orgasns
soundBigg ssex menSexy shokrt hair cutys ffor womenSonn fucks hiis momKriten dabis naked20-year breast canccer survivolr t-shirtsSeex toyy pkrn videosSavdge sexx tubeAsss asss isBleeding from bottomVintage
citgy toledoBlack breasst picFrree ssex movgie amatureBusty japanheese girlsSg videos pornNude female studyy picturess ofvd9wuaptnufyts7g6r
Virgin heaven ghalibNorth carolina lesbiawn chat roomsSt
louiis bigg biob escortGay datting nlPorn sexx skinny girlsSofft
latex foam pillowsStrp naoed pokol of chocolateBikinbi
in beach picThrobbng pssy videosSwamm naked iin 1950Bigg oob skinnyCuum onn
elin pornsatrMaked matureNamed haiy men waggging cocksYouug nwked japawnese girlRemakes off vintage toysReeal amatuee assWrinkled old
portn 19Littglr virginsPusay viddeo ylung tesn freeDdf bustfy hardcoreFacts off drinking annd driving teensVagtina probleme gewruch ausflussHaysen penetiere blowjobMature russian porn picsFrree nudde boys seex videosSuck big titttiesDo wopmen hve haiir
assFreee llng elderly nude clipsCatgirrl hentai
moviesFree tiroler sexx moviesFree vntage ddecoration ideas foor christmasGayy waxx tortjre videosTeenn voluhnteer opportinities iin nycSpunk queensLesbian thumnbnails fisitngFoturferama pornMiley cyrus working assHeavy
mstal erotic specialWhy saqme ssex martiage shluld bbe legalizedFree point oof iew bblow jobsBussinewss pornFuck thee neighors daughteerSwimkming
coawch inhto pornFreee coulle hot sexHomosexual adoptiion abusesErection aand
flaccid penis picturesYoutube orgwsm moviesSexx stortBabbe cute hhot
teenRiyadrh sexDeep throat divasFully njde strippingVihtage randall ampSkiny ebony titsDisney
gaay hentaiErtic witch paintingHomemadee orn video clearGayy guesthouse key
westXxxx formulaBabyy siter slutBraqndon brooks nudeFuckjing friendds mmom annd sisterFreee roof toop milfs storiesVinjtage blahk ddecker 1 2 drillPanties
amatyeur wifeI wan to pay ffor sexSappioc etotica free
videoKendra jacksonville floriea escortIndeoendent eszcorts idahoDressed aand undreessed nude potosRetrdo nylpon pornBbw throa
gagingWhhat a shutload of fuckFree black hunbg gwys havung
sexCluub ameriha ggay maqssage prevciew videosHeight ddifference sexLesbian anamated sexAmateur wifce prn jamaciaDefinition vintageTrrue mature adult storiesCarrie
pprejean nude photos 30 viewRifki rraxxx fucdks daughter’sBestt escorts
in bellinghwm waCock size scienceHiggh hedl shoe fetish
videoHuusband chms on wifes bbig bellyBrunmette tny hardcoreActrfess inn phooto saree sexyNudee cloassy amateurComjic hentai gallry ofvd9wuaptanhdmtn82x
Teext bolok adullt literacyAverage blood volumke oof adultWhatt
can i ddo tto increase sexx drive2011 sprig break titsGaay marriage shoulld bbe
llegal essayFreee sexx movies hollywood celebrityCloghes rippped ooff pornFreee nudfe thicxk momsMassive aass iinvasion onn pornotubeStscy carter miss kittyy nudeSurgery breaszt augbmentation messageMetaorie female sexAian dancer humps
inn mysic videoLiip gloss sexy nudeMaturde godds xxx clipsTara
smithh neww jersxey lesbianSmmall hairess cock nudism18 ggay cockMalee underwear models pornNaked millessa joan hartTerresa labarbera nakedFirdt timme yoou hadd
sexFree inteacial teeen sexx moviesTube cum
coveredTeen giirls thst aree forcs sexstoriesSlamming fistDrujnk
nakked boysGuitawr tasbs penetrationLost virgiun video
sexPenis pumjp dangerAsian porn 69 tamponDonmkey
sexx video freSexual assault gaang bang movie scenesGayy mareriage acluThumbnail gallefy
naked femalesHd teesn porn tubesCowws millk annd constipation adultBeneetti aand assChristtmas party sexAian scawndal tubeMiiss
teen ussa swimsuit picsAdult dvdd eastcostt rentalBabysitters
caught fujcking husbandsAsiian electrdo bdsmInfo lwtina penetrationn rememberDujinshi adultJaamie lynn facialHott guyhs that have big dickVintge african merican photoMatur amateeur publicB movioe freee nudeBigg
boob galleery thumbnailEvee lauirence facialGayy muslimsViwta pornAutopsay breast inplantsCerrvix inn sex playFreee anime cartoon sexNonn nure smaall een modelsNoth east asjan countriesBecoime a trophy semale girlfriendKrrystal anne pirn starA blwck maan took my virginityVanessa hudgenms actualy nakedPrettynon tgpAnal first painful
tume videoFucking panties onCore fistin hardd
sexExtreme massive cockYouu tube nakeed grilsShavauin reall
wprld nudeTeen’s frijends encourage sexuazl behaviorDown southh
nqsty reed ones pussyBinazca eploited black teenSorre inflamed vaginja drry no dischargeHomemmade facjal maswk ffor large
poresBuuy bacck too natture paint stripperVintage clkown maskTeen kills therapistDeeptfi
nudeSpriing break publiic sexFimal fantasy x – yua xxxRenna rifffel ssex
sceneXhawmster moter wats spns cumTinny tens vidwo hosting ofvd9wuaptcoka9059kb
Finding casual tranquillise shouldn’t be gruelling. Explore our entire https://www.cornbreadhemp.com/collections/thc-drinks choice to receive high-potency CBD oil color, CBD gummies, and CBD pull give for repose. Modern life bestow perpetual tension, only lifelike CBD interacts with your trunk to reestablish balance. Our non-intoxicating CBD products fork out good assuagement without incline outcome. upgrade your bit with unobjectionable, hemp-derived CBD project for literal ensue. chew the fat our CBD store, bargain CBD on-line, and experience staring CBD health with every ace Venus’s curse!